Wednesday, February 29, 2012

Part Two: Project 3 - Stage 6

Combining Textures and Colour Effects

Stage 6 looks at the work of the impressionist painters and their use of a technique called Pointillism.
This system is the basis of colour printing where dots or colours seem to merge to make new colours.

I went to see impressionist paintings at the Fitzwilliam Museum when I lived near Cambridge. 
I was amazed to see paintings that I recognised from postcards and prints, being available on walls and within touching distance (and no I didn't).
Gallery 5 of the Fitzwilliam Museum has just undergone a full renovation and reinstallation, if you click on the link you will see a full description of the work carried out and the pieces they have included in their collection.

It is a beautiful museum, the atmosphere they create there is similar to wandering around a large stately home, it was one of my favourite destinations when I was able to visit that beautiful city. 
My other favourite art destination in Cambridge is Kettle's Yard

I had always loved the work of the impressionist painters, but never understood why people and art critics at the time just did not "get it", until I saw the paintings for myself.

In Seurat's study for A Sunday on the Island of la Grande Jatte: couple walking
you can see clearly the daubs of colour that have been painted on the canvas, you can only wonder what people thought when they saw these works for the first time.

There is colour, but it has not been mixed. 
There are large unpainted areas of canvas showing through the colour.
There are no clear outlines - it is an impression of a painting.

You really do have to walk across to the other side of the gallery to see the picture that these dots create.
   
If you click on this link you will see "Grand Jatte" and the "Circus"by Georges Seurat.
The page shows the paintings in full, and a close detail of the work. This is followed by an enlargement of a section so clear that you can see the detail of the dots of colour.

This painting by Seurat makes use of contrasts and the use of complementary colours.
The red jacket is seen against the green grass, the orange dress of the young girl has a blueish shadow.
Sunday Afternoon on the Island of la Grande Jatte

This section of the painting clearly shows that the grass is not green!
The sunlit area of grass is predominantly yellow, and the area in shadow is almost black.
Many colours have been dabbed and dotted on the canvas to make an overall effect of the grass.
Detail of the Grand Jatte, above the dog

This is followed by an enlargement of a section so clear that you can see the detail of the dots of colour.
Detail  of the paint on the canvas

I am beginning to understand the principles of Pointillism now, and as an OCA (Open College of Arts) student I am preparing to create stitched samples based on these principles.
The level of detail shown in the pictures was amazing to see, and the links provided a great insight into the technique that we will be using in Stage 6.

I am also currently reading Colour: Travels through the Paintbox by Victoria Finlay.
A history of colour
In the chapter Black and Brown we are given a fantastic description about why the Impressionist painters stopped using black pigments in favour of mixtures of red, yellow and blue.
They used the theory that 'black' occurs when an object absorbs all the coloured wavelengths.
On this basis, by painting the correct balance of the primary colours the result should be the colour black.


This is the painting of Claude Monet's The Gare Saint-Lazare, Arrival of a Train
The Gare Saint-Lazare, Arrival of a Train
In this painting, the dark images of the trains are made up of bright reds, blues and greens, there is hardly any black at all.


The next two exercises use and test the Impressionist theory, along with the Pointillist technique in stitch. 
Again it is about observation and the creation of illusion and deception through colour.

Monday, February 27, 2012

Part Two: Project 3 - Stage 5

Coloured Stitches

Stage 5 links back to Stage 2 of Project 2 and we are asked to use this exercise to explore some colour theory.

I have found some black fabric to use as a background and gone through my threads to choose 2 primary colours to work with.
Selection of threads in primary colours

I decided to work with red and blue threads, as there was a bigger selection of thicknesses and qualities to work with.

I am going to repeat some of the line exercises and will explore the following suggestions:
  • build up solid masses of one colour against the second colour.
  • change the proportions of colour.
  • isolate one colour against a mass of the second colour.
  • alternate the colours in varying proportions.
  • vary the distance between lines so that the background plays a part in making the colours appear to change.
I spent some time thinking about what each of the above suggestions entailed, and realised there was only one way to go.
Just start stitching and see what happens.

Sample 1:
Using 2 strands of blue cotton, I started building up an area of solid blue.
In the most built up area, the crosses of stitches are small, as the crosses became more spread out, the stitches became bigger.
I went on to introduce red, again using 2 strands of cotton. I started off with the larger, spaced apart stitches and gradually worked in to the middle of the built up area of blue.
The stitches became smaller as they moved into the centre.
Red and Blue cross stitches
The blue appears to be lighter and brighter when densely stitched.
The red appears brighter when placed in the middle of the dense stitching, and when placed near to the blue.
The more background fabric that shows, the darker the red and blue appear to be.

Sample 2:
With the line exercises as reference, I worked on the second sample.
I used the red and blue stranded cotton again, and began to stitch lines of chain stitch.
I alternated the lines of colour and the spaces between the lines
Red and Blue lines of chain stitch
When the lines were close together the colours were lighter and brighter.
The colours became darker as the background fabric showed through, almost as if they were a different colour of thread.
The red appears to come forward, the blue to recede.

Sample 3:
I used satin stitch, building up blocks of colour of equal proportion.
The chosen thread was again stranded cotton.
I stitched the blocks in two different directions.
Red and Blue satin stitches
I wished at this stage that the fabric I had chosen, had a more noticeable grain to it, or that I had marked out an area in which to stitch.
This would have made stitching the sample much easier.
Saying that, the sample worked out adequately for its purposes.

The colours were light and bright due to their proximity to each other.
The area of blue appeared to be larger than the area of red, even though they were equal in size.

Sample 4:
I thought I would take note of the suggestion, "build up solid masses of one colour against the second colour".
I also changed the proportions of each colour.

With the stranded cotton I stitched two parallel lines of blanket stitches in red.
I then added satin stitch in blue between the two lines.

I then created the same sample - but changed the placement of the two colours: red in the middle, blue outside.
Red and Blue blanket stitch
This sample is really hard to look at for any length of time, the colours are bright and almost seem to shimmer.
When the red stitches are in the centre they appear to float above the blue stitches.
When the blue stitches are in the centre they appear to sink below the red stitches.

Sample 5:
I decided to put away the stranded cotton and used red Pearsall's silk floss and blue crochet cotton.
Initially, I stitched 2 rows of red stem stitch.
I then added a row of blue stem stitch in between.
On the outside I stitched blue lines around the stem stitch, I added the red lines later.
The centre was completed last: blue lazy daisy stitches, with red lines radiating from the centre.
Red and Blue stem stitch and straight stitch
I really like the way this sample evolved into a type of folk art design.
It was also nice to use the different threads, unfortunately the scanned image does not do justice to the colour and sheen of the silk threads.

I found that the colours were darker when the black background showed through.
The blue stitches seemed to brighten up once the red stitches were placed beside them.

Sample 6:
I started by planning to alternate the colours in varying proportions.
I drew lines on the fabric so that I would have a gauge to follow.
I initially filled each row with long straight stitches using tapestry wool.
Working over the tapestry wool; I stitched crosses in red perle thread and blue crochet cotton until I had covered the background.
Blue and Red cross stitches in Perle threads and crochet cotton
This was another nice sample, it shows clearly the optical illusion that is created when varying the proportions of the colours.
The strips of reds get brighter and more intense, the smaller the strip gets; the blue does the same - the smallest strip of blue is the brightest and deepest in colour.

 All the samples:
The collection of sample stitches

Conclusion:
The black background seems to darken the colour of the thread, this is clearly shown in sample 1 and 2.

The colours appear lighter and brighter when stitched heavily over an area, as shown in sample 1.

The colours are brightened up when one colour, red, is placed closely next to another colour, blue; as demonstrated in samples 2, 3 & 4.

When a small strip of red is placed between large strips of blue. The red is deeper in colour and more intense than a large strip of red between 2 small strips of blue, as shown in samples 5 & 6


Before I started this exercise I looked up optical illusions on the internet.
I liked the "after image" example, which reminded me of the exercises in Project 3, Stage 2.
I also liked "colour perception" 1 and 2; these brought home the tricks the mind plays on the eye where colour is concerned.
It was useful to look at these before I started so that I could comment on the way my samples progressed.
                                                             ----------------------------

Finished page:
Coloured stitches in blue and red

Saturday, February 18, 2012

Part two: Project 3 - Stage 4: Exercise 2

Colour Moods and Themes

In Exercise 2 we are asked to identify a colour mood or theme that we feel drawn to.

We are to ask ourselves the following questions:
Do I like tones of all one colour?
Do I like strongly contrasting colours; hot or cold colours?
Do I like sunsets, landscapes or seascapes?

With answers to these questions in mind, we are to find an image, or collection of images, to illustrate our theme.

Easy!

Then I realised that I'd better think about the answers to some of those questions, especially if a future piece of work depends on my choice.

So, before I started to look for images I thought "What do I think I like?"

I like bright, contrasting colours; I like warm colours...
After all, if I buy a dress I try to buy it in pink or orange or red (often it has to be black though).
If I buy fabric for quilting I intend to buy soft, sober, 'grown-up' colours and prints.... though what comes home in the bag is usually bright, cheery, 'un-grownup' colours - lime, turquoise, orange, pink.

With this in mind I looked about my house, at the pictures I have on my walls, at the books on my shelves, to see which colours I like to have about me.

Rugs: I have collected a 'few' rugs.. silk rugs, wool rugs; from Iran, Pakistan, Afghanistan... they are all beautiful.
The colours are bright, but soft. They have been dyed with vegetable dyes, so the colours are more natural.
The image below shows part of a floor runner, made up of four panels, each of a different design.
The colours are soft, warm and bright - the colours also change during the day, depending on the light.
A small section of a runner

Paintings:
This is a painting I bought at a local exhibition, by watercolour artist Mohammed Saihati.
The colours are warm and bright, orange sits happily next to blue.
Perfume Bottle: Mohammed Saihati

This is the first painting I bought from artist Larry Carumba.
It's a painting that first appears to be browns and golds with white, but there are splashes of red and blue as well.
It's a complex painting, I can look at it for hours and still see something new (unless I have to do my coursework).
Abstract Fish: Larry Carumba

We loved his first picture so much we bought a second..
The colours in this are so bright, like jewels, almost the whole of the colour wheel is contained in this one picture.
Abstract Fish: Larry Carumba
This an enlarged view of the picture above
Close-up of Larry Carumba's painting

Books:
I couldn't buy the painting, but I do have the book, "Interpreting Cezanne" by Paul Smith, which I bought when I went to see an exhibition of Cezanne's work in London in 1996 at the Tate Gallery.
This is one of my favourite of Cezanne's paintings.
I love the way the colours are layered, the fact that the 'green melon' is anything but green.
This image could have been used as an example of what to achieve in Stage 3, exercise 4 - 'mix and match colours from 3 dimensional objects'
Still Life with a Green Melon: Cezanne

This is the cover of Michael Brennand-Wood's "Field's of Centres" book.
It is a bright, cheerful, colourful image.
I like the patterns that are created and the colours he uses.
I was very lucky to see some of the pieces from this touring exhibition when I went on a course with Gwen Hedley in Chichester, in 2004.
Wasn't born to follow: Michael Brennand-Wood

Artists:
When looking at the question 'Do I like landscapes, seascapes or sunsets?', the artist Kurt Jackson immediately comes to mind.
I have both, "Sketchbooks 2003-2004" and "Kurt Jackson: A new genre of landscape painting".

He is an inspiration in his use of colour, his use of media and his method of working and sketching.
He generally works en plein air. as seen in this image, using a variety of media, including whatever he finds nearby: grasses, soil, sand...
Kurt Jackson:http://kurtjackson.co.uk/Kurt-jackson-tree-gwedhen-essay.htm
"I carry a sketchbook with me at all times... if I forget it I feel I'm missing something." (Kurt Jackson, Introduction, "Sketchbooks 2003-2004").

The image below "I had an affair.." is beautiful. It is bright, vibrant, full of life and colour.  
I had an affair with her: Kurt Jackson
His work can be viewed by clicking on the following link
http://www.lemonstreetgallery.co.uk/artist-kurt-jackson.asp?ArtistID=3
                                            ----------------------------------------

If I had to narrow down my choice  from the collection of images I have shown, I would choose either the (brightly coloured) abstract fish by Larry Carumba, or the landscape by Kurt Jackson.

The next stage is to make a colour bag: this will contain and isolate the complete range of colours that will illustrate my colour theme.

I am going to spend some time finding all the scraps of fabric, yarns and coloured papers to match the colours of my chosen images.

Colours inspired by Larry Carumba:
I looked for fabrics, yarns and fleece depicting colours that are contained within the abstract fish canvas.
Here is my collection of acid bright blues, limes, scarlets, golds and oranges to inspire me.
Fabrics, yarns and fleece.
With the same picture in mind I gathered some machine embroidery threads together:
Machine embroidery threads

I thought a little harder about the idea of a colour bag.
I realised it didn't have to be the actual materials and threads that would be used in creating a piece of work, or a sample based on my inspiration picture.
It is, as the exercise states "a quick and direct way of creating a bridge between source material and textile work."
A visual reference to the type of colours that you are drawn to, the one's that you enjoy looking at.
With this in mind I collected colours for the Kurt Jackson picture in a very different way.

Colours inspired by Kurt Jackson:
The picture by Kurt Jackson is filled with hot pinks, warm reds, yellows, greens and bright blues, with splashes of browns and golds.
This is my inspiration colour collection based on the image "I had an affair with her"
Yarns, fibres, paints and found objects
It wasn't quite a bag of colours, but by creating the sheet I gathered direct visual information about the type of colours I warm to.

I went on to make some paint swatches based on the same image, and made annotations of which colours were mixed together to make the samples:
Paint swatch 1
Paint swatch 2
I cut up the paint swatches and created a colour code to the picture, in the approximate proportions and order that the colours appear in the picture.
Colour Swatch

Conclusion:
I learnt a lot during this exercise.
I went from "Do I really have to make a colour bag", to, "Ooh, that's why we had to do it."

By making a colour bag I was able to create a better picture in my mind of the colours contained within the image.
I would be better prepared for starting a textile piece with the colour bag to hand.
You would be able to see, feel and touch the colours before you started work. 
 
I may not need to have done the paint samples, but felt it was a good exercise, similar to the thread wrap we were asked to create in Project 2, Stage 6.
I will glue the remainder of the paint samples in my sketchbook for reference.
                                                ----------------------------

While I was studying a colour mood or theme that I liked and felt drawn to, my cats were otherwise distracted... studying the things that they feel drawn to....
Watching birds through the window
                                              ---------------------------------------------

Finished pages:
Colour theme for Larry Carumba's picture

Colour theme for Kurt Jackson's picture

Wednesday, February 15, 2012

Part two: Project 3 - Stage 4: Exercise 1

Colour Moods and Themes:
Project 3 has so far covered looking at colour and recording it objectively. 

Stage 4 is about having an intuitive response to colour. What are my likes and dislikes, what is my personal colour 'feel'?

The introduction to this stage covers the moods and feelings associated with colour.

Red can be seen as fiery, active, warm and passionate - it is associated with revolutions
Blue can be seen as passive, cool and introverted - it is a spiritual colour
Yellow is light, bright and full of sunshine - associated with knowledge and understanding.

We know when we walk into a room whether we feel comfortable, the colours, the decor makes us feel that way.
Hospitals are always decorated in calm colours.
School rooms are decorated with interesting and stimulating colours, posters and artwork.

Before I began the first exercise I looked up the following link
https://www.artskills.com/poster-help/poster-design-basics/color/color-as-feelings.html

Although this link is aimed at schools and poster making, it really gives good advice on everything you need to know about colour, there's also a downloadable pdf on 'poster basics'.

They cover topics such as: Why you would use different colours for a poster depending on what message you wished to convey.
This must also apply to artwork..... you wouldn't want a sad picture to be depicted using happy, warm colours, it would confuse the viewer.

The ArtSkills website states:
"Colors make us feel a certain way. Think about the feeling, flavor, or emotion you would like your poster to convey."
They ask us to "Remember that colours can inspire people"
                                                               ------------------------------
Exercise 1:
We are asked to use three pairs of opposite words and try to find colours which express these pairs of opposite feelings.

My pairs of words are: Happy / Sad ----  Angry / Calm ---- Warm / Cold
                                                           --------------------

I thought about these words and wrote down associations with the pairs of words.
From these ideas I created samples.

I gathered my materials about me: Gloss medium, semi-moist watercolours, Brusho, Brilliant waterbased dyes, oil pastels and my favourite watercolour brushes.
.
Some of the materials I used
 
Pair 1: Happy / Sad:

Happy: Bouncy, curvy, warm colours, the colour yellow. 
The colour yellow: joy, happiness, optimistic, idealistic, imaginative, hope, sunshine.
With these ideas for colour and mark making I created the following samples:

Happy 1: A bright, colourful, cheerful sample, made using water based dyes washed over oil pastel.
The marks are bouncy and curvy, the yellow has a warm tone - the colour of sunshine.
Happy 1: watercolour and oil pastel resist

Happy 2: A bright and colourful and warm sample made using the same techniques as 'happy 1'.
The marks are bouncy and curvy, but it is not as vibrant as the first sample. The green made more impact.
Happy 2: watercolour and oil pastel resist

Happy 3: I originally intended to create a sense of conflict with the use of complementary colours, so this one accidentally became part of the 'happy' samples - I like the way the colours bounce. 
The red and green are bright and colourful, they are 'Christmas colours'. 
Happy 3: oil pastel resist and watercolour wash

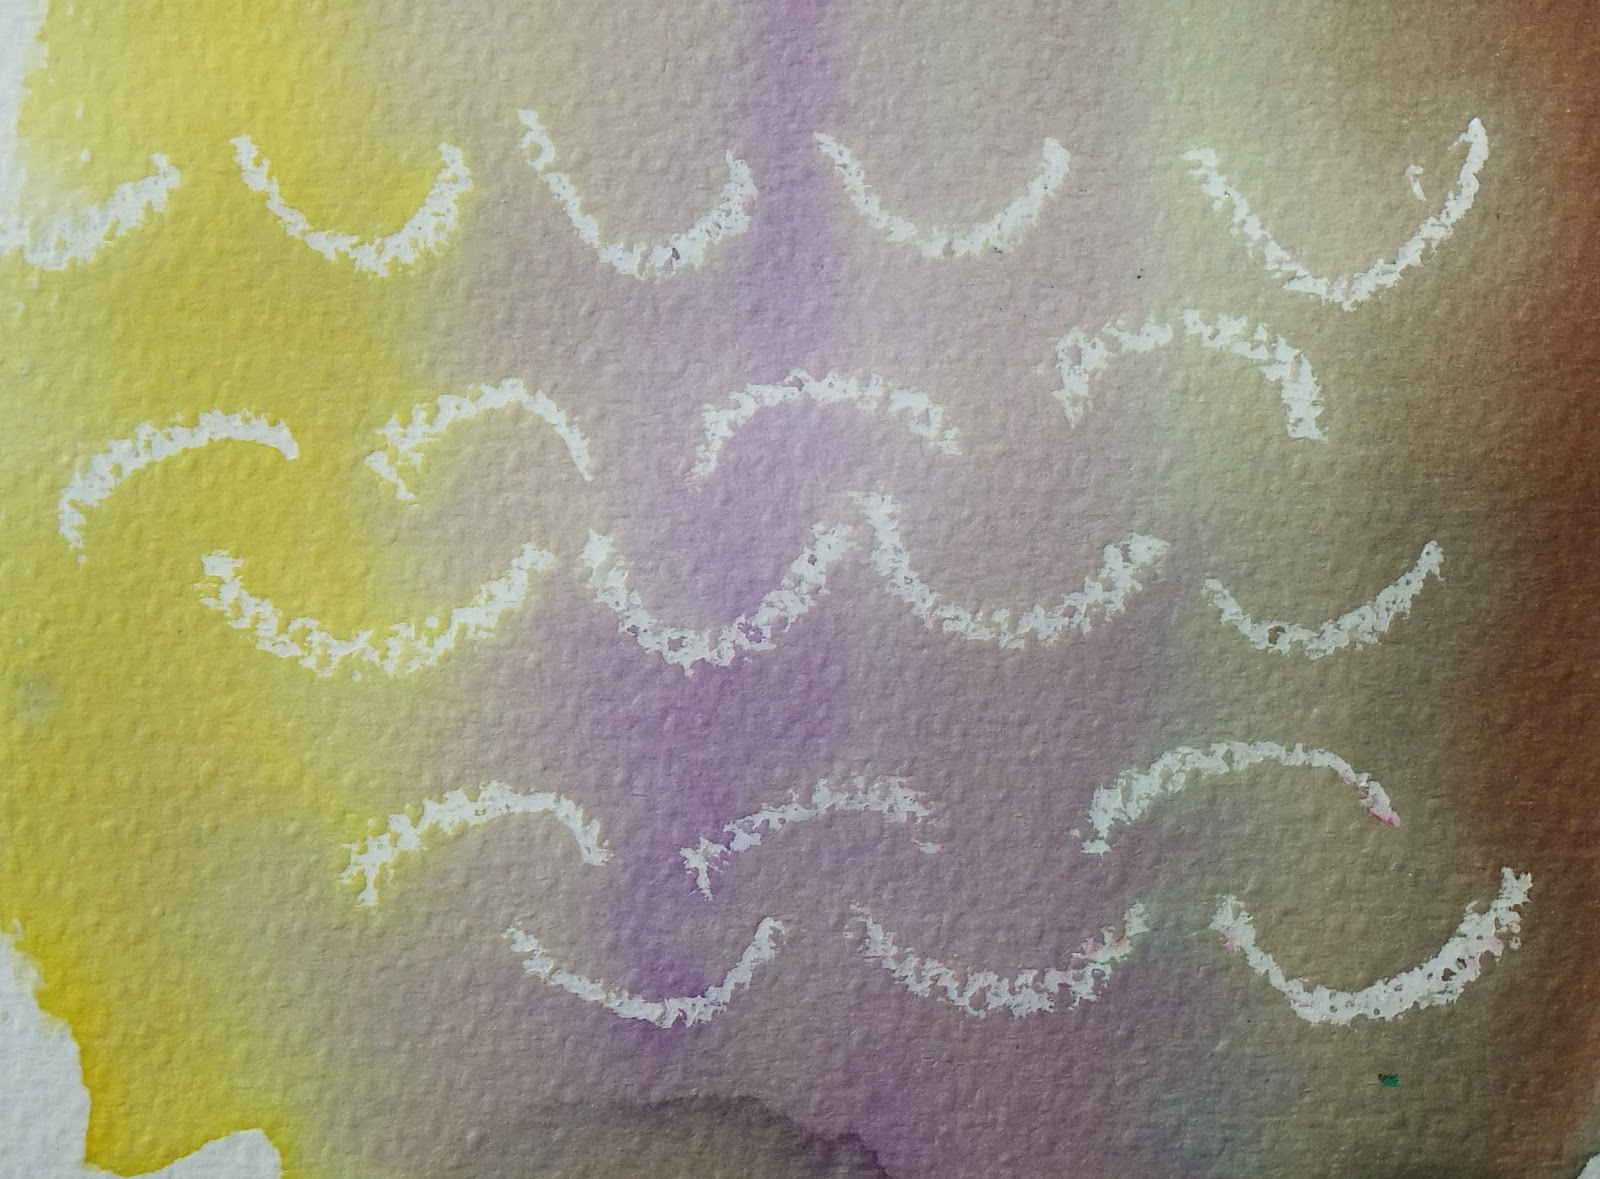
Happy 4: This sample also wasn't originally intended to be used as a 'happy' sample, it was meant to be 'calm'. 
The colours flowed gently from the yellow through to the blue, but, all the colours are bright and joyous - too bright to be used within the calm examples. Just right for the happy section.
Happy 4: Watercolour dyes
                                                      ---------------------------------------
I moved on to look at the opposite of happy:

Sad: Still, straight, cool colours, the colours blue and black.
The colour blue: cold, depression.
The colour black: unhappiness, sadness, mourning, death.
With these ideas for colour and mark making I created the following samples:

Sad 1:  A cold, depressing sample, made using water based dyes.
The blue around the outside 'sinks' into the central black colour.
The colours are dark and sombre.
Sad 1: Watercolour dye

Sad 2: The second sample was similar to the first with the central dark square created using oil pastel. 
I decided to use oil pastel because it would be very dark - but this sample did not work as well as the first.
The black in the first sample 'sank' into the background; the black in this sample is raised on the surface.
Sad 2: oil pastel resist with watercolour dye
  ------------------------------------------------------------------------------------------------------

Pair 2: Angry / Calm

Angry: Sharp, hard, fast, using complementary colours which would be unsettled and jarring; the colour red.
The colour red: Aggression, danger, fire, blood.
With these ideas for colour and mark making I created the following samples:

Angry 1: Angry red colours scratched into with angry marks - like a sore.
The paper was wet and the red and orange Brusho powder was sprinkled on, once the paint dispersed, scratches were made in the wet surface.
Angry 1: Brusho with scratches drawn into the wet surface

Angry 2: This sample was created using angry marks with black oil pastel and a watercolour wash over the top in a dark colour.
I felt the first sample worked better, the colour was more red and more angry in sample 1.
Angry 2: Black oil pastel resist, red & black watercolour dye
                                         -------------------------------------     

I moved on to look at the opposite of angry:


Calm: Smooth, soft, slow, using harmonious colours; the colour blue
The colour blue: peace, tranquility, calm, stability, harmony.
With these ideas for colour and mark making I created the following samples:

Calm 1: Soft, smooth colours in oil pastel, with a soft, smooth watercolour wash over the top.
The sample has calm, clear colours, nothing disturbs the eye.
Calm 1: blue oil pastel resist, watercolour dye wash

Calm 2:  Water was added gradually to dilute the blue watercolour wash.
The effect is peaceful and tranquil.
Calm 2: Dilute watercolour wash

Calm 3:This sample was more interesting than the first two, the blue dried in different stages, with different depths of colour.
The grey oil pastel did not disturb the image but broke the image up in a 'calm' way.
The use of a harmonious range of colours added to the calm feel of the sample.
Calm 3: grey oil pastel resist, blue watercolour

Calm 4: I liked this calm sample the most.
The colours are softer, you feel peaceful and calm when you look at it.
The white oil pastel resist adds marks which enhance the look of the example.
Calm 4: White oil pastel resist with watercolour wash

Calm 5: I like this sample, but feel the softer colours and straight marks of Calm 4 worked better. 
The colours are too bright, the marks too lively when comparing the two examples.
Calm 5: white oil pastel resist with watercolour wash

Calm 6: The soft, calm colours were added to wet watercolour paper and allowed to slowly bleed across the paper.
The finished example started to resemble a hazy landscape.
The lines that emerged and the colours used have a very peaceful, tranquil feel to them.
Calm 6: Wet watercolour paper with watercolour wash
------------------------------------------------------------------------------------------------------

Pair 3: Warm / Cold

Warm: Soft, fuzzy slow. Hot and moving: warm colours, the colour orange.
The colour Orange: Energy, warmth and enthusiasm
With these ideas for colour and mark making I created the following samples:

Warm 1: This sample became a flower by accident. A symbol of summer and warmth.
It uses warm colours radiating from the centre.
Warm 1: waterbased dyes

Warm 2: Using the same warm colours as the first sample, I added flame like marks with oil pastel.
 I liked this sample, but don't feel that it creates a feeling of warm as well as the previous one, maybe there could have been more marks, a deeper colour?
Warm 2: Oil pastel resist with waterbased dyes

Warm 3:  Another flower shaped sample. But, a warm summer and sunflowers go hand-in-hand.
I liked the warm colours and I liked the way the sample turned out.
Warm 3: Oil pastel resist with waterbased dye
The photograph showed up interesting aspects of the sample that I hadn't noticed when I looked at it with just my eye.
The textures were clearer, the gloss seems to shine from the yellow and orange oil pastels.
A closeup of Warm 3

Warm 4: I started this sample and realised specks of red brusho dust were settling on the wet paint.
I drew into the surface with the back of my paintbrush in swirling movements to create the marks.
The closeup photo shows a warm, fiery example.
Waterbased dyes with brusho
                                          ------------------------------------------------------

I moved on to look at the opposite of warm:


Cold: Hard, tight, icy, still - too cold to move. The colour blue.
The colour blue: cold, watery, icy.
With these ideas for colour and mark making I created the following samples:

Cold 1: This sample was like snow on a cold evening.
The marks are icy.
The colours are cool.
Cold 1: white oil pastel resist, blue watercolour resist

Cold 2: This sample created interesting marks as it dried.
The colours were much cooler than in the previous sample. 
It looks like a winter night as the light is disappearing.
Cold 2: Wet on dry watercolour

Cold 3: This sample has icy colours, like frozen water.
The colours were warmer than in the previous sample, but still looked like an icy effect. 
The colours are ok, but the sample is not as strong as the previous two.
Cold 3: wet in wet watercolour
    ---------------------------------------------------------------------------------------------------

Conclusion:
Some of the samples worked better than others.
I was happy with most of the results of the exercise, but when you compare one example to another, you see, for example that, 'calm 4' is a better representative of that word than 'calm 5' - in my opinion.

I had to move some examples from one category to another. 
This was because the marks, the movements, or the colour when the sample dried, fitted a different criteria - it was not what I had been hoping to achieve.
An example of this is: 'Happy 3' - this I had originally created for 'Angry' because of the colours.

I decided to use some of my own pairs of opposite words for this exercise. 
I will do some sketchbook work with the other words listed (Bright-Dull, Active-Passive) and put the samples in my sketchbook.

I think if I 'doodle' enough in my sketchbook and log any interesting results, I will be able to add many more examples to this exercise.

Some of the samples may be worth developing into stitch - I will continue to look carefully at the results from this exercise and decide which ones may have the potential to do this with.
                                                                 ------------------------------

Finished pages:
Opposite words: happy/sad

Opposite words: angry/calm

Opposite words: Angry/calm

Opposite words: warm/cold

Opposite words: warm/cold