I used shuttle sticks (link to a website with weaving accessories here, shuttle sticks featured at the bottom of the webpage) for most of the weaving.
I also needed to make a butterfly/finger skein for some of the smaller areas of weaving.
This is a photo of my first 'butterfly':
.JPG) |
| A butterfly |
The skein should stay untangled if pulled from the first end.
This was a really useful technique and one that I had not used before, always having to untangle a bag of embroidery threads and yarns before use.
Starting to weave: the instructions say "Now you can begin to weave" - I practised plain weave for a while before moving on to the next part of the sample.
It was hard to get this part right to start off with, at times I pulled the weft through too hard - and the width of the cloth started to narrow, at other times I didn't pull the weft through enough - and I was left with a ragged edge.
I got slightly better at placing the weft across the warp with the right tension - but even by the end of Project 9, there was still room for improvement.
I went on to experiment with the order in which I wove the coloured weft threads. I tried out various combinations: one weft of red , followed by one weft of white - this became rows of vertical lines; three wefts of white followed by one weft of red - became a spot of red on a white background.
In my first sample I also tried out 'curved wefts': by weaving in small sections, shapes are created, this technique was fun to do and seemed to create movement in the sample piece. This is shown at the top of the sample below:
My first sample:
.JPG) |
| First weaving sample |
I did not write down any instructions for this sample - I did not make a note of which combination of colours made which section, so I felt that I ought to try again, and this time jot some notes down.
My second weaving sample ran on from the first - I wasn't ready to cut the warp threads yet
I changed to pink and green threads and this time I took note of the combinations used for the weaving.
 |
| The start of my second weaving sample |
I chose the pink and green yarns because they were the same thickness as the red and white yarns that were used in the last sample. These were a sock weight yarn. Unfortunately they proved harder to photograph in natural light, and impossible to photograph in artificial light - they had a slight sheen to them. My images do get clearer - but this was the only picture I took of this section of weaving.
I started with two plain weave sections, the first in green, the second in pink.
The next section of fine wavy lines was created by making two passes of pink and two passes of green (repeated), I had to remember to 'carry' the thread up the side of the weaving.
This image shows the sample more clearly - the fine wavy lines (as described above) are at the very bottom of the picture)
 |
| The second weaving sample (clearer image) |
I wove an area of plain pink to separate the sections.
These are described from the bottom section up:
- fine pink line within a broad green stripe: two shots of pink, four shots of green - all started from the same edge.
- Even thickness bands of pink and green: three shots of pink, three shots of green.
- Dotty - pink dots on a green background: one shot of pink, 2 shots of green.
- Dotty - more spaced apart pink dots on a green background: one shot of pink, four shots of green.
- Dotty - this section was one pink, two greens and replicated one of the previous sections.
- Vertical stripes - pink stripes on a green background: 1 shot pink, 1 shot green - both from the same side repeated five times. Then three shots of plain pink weave, followed by 1 shot green, 1 shot pink, repeated five times.
- Vertical stripes alternated to look like big dotty background: using same technique as the last - 1 shot green, 1 shot pink repeated, then change to 1 shot pink, 1 shot green repeated - you need to run 2 shots of green to separate the sections.
- pink triangle/green triangle - crossing in the middle: with the pink and green yarns at either side - open the shed and run the yarns (at the same time) to the centre, lower and raise the warp threads, take the green back to the same side as it started, take the pink back to the same side it started. By varying where the threads meet you end up with the yarn forming shapes such as triangles - this method was described as 'diagonal slits' in my Reader's Digest Manual of Handicrafts p.89.
- Soumak - the raised green area on a pink background: the textbook (OCA) p192, says that "Soumak is a traditional technique from the Caucasus. Soumak creates a ridge by wrapping the weft around the warp and produces an interesting surface quality." This was fun to do and provided an interesting texture in the middle of the plain weaves that surrounded it.
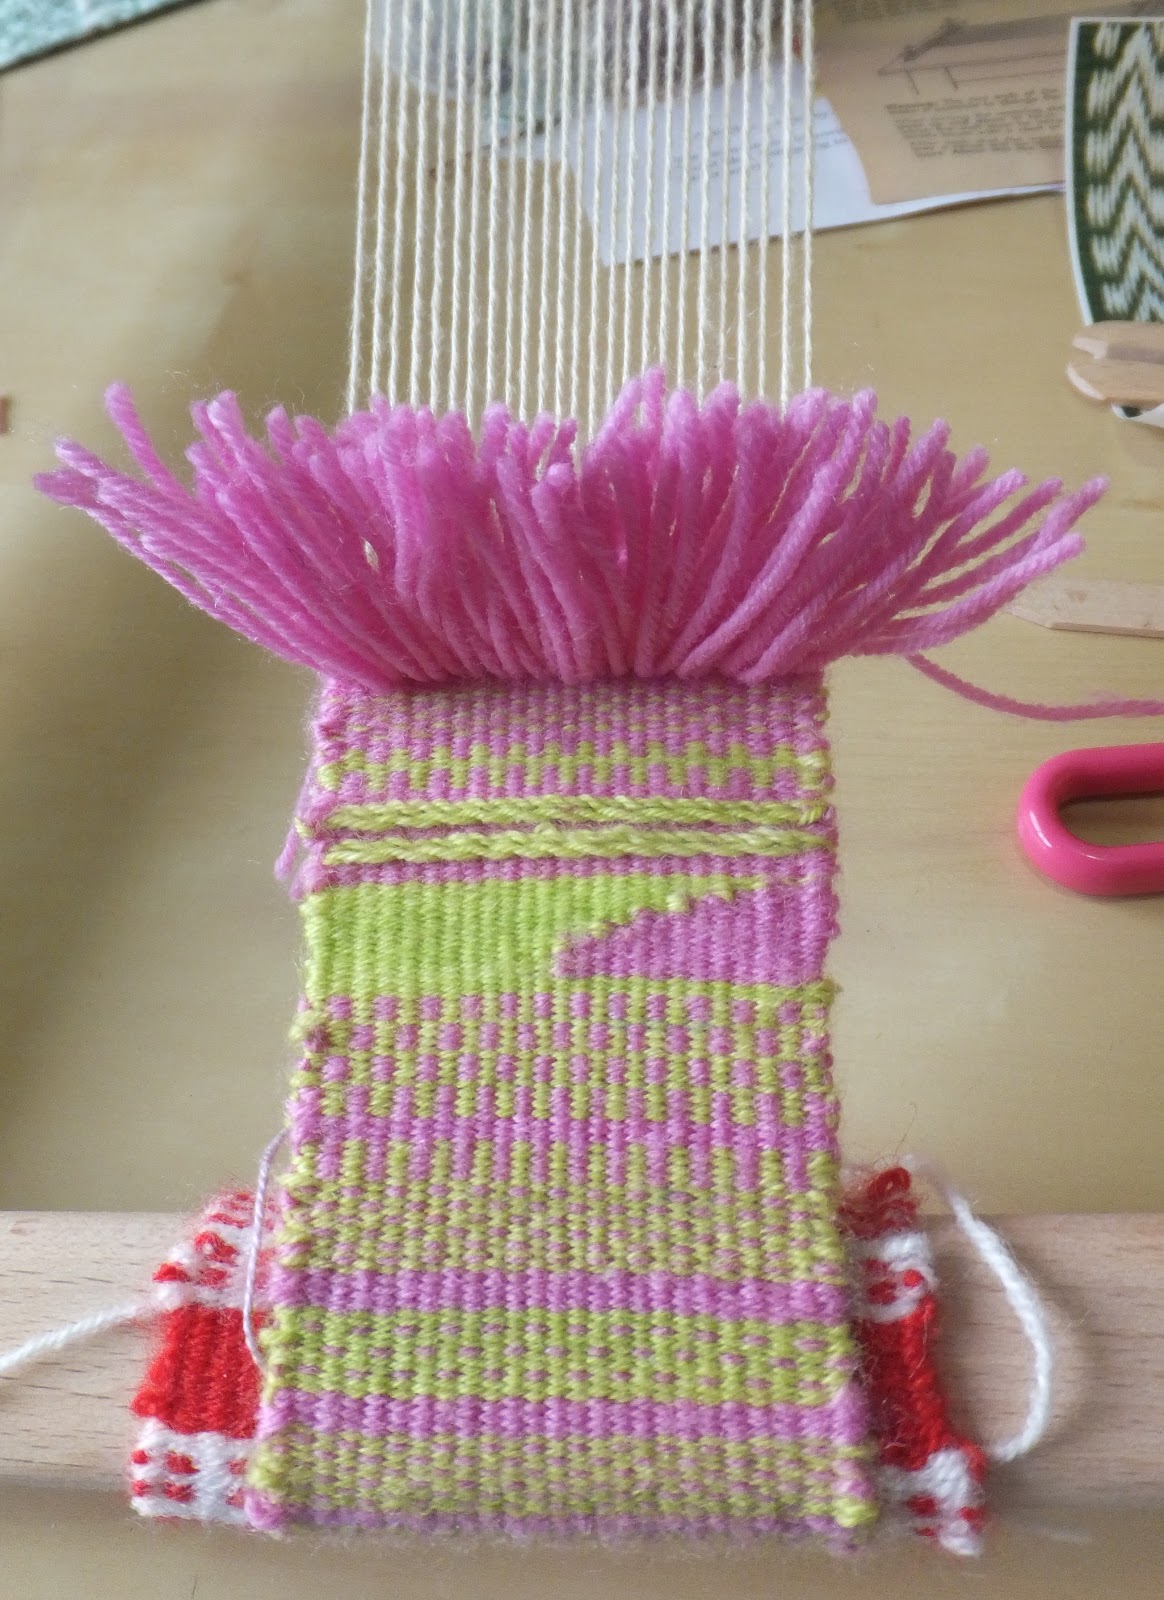 |
| The last technique I tried for the second weaving sample - Ghiordes Knot |
The yarn was cut into lengths of 10cm and wrapped around the warp to form a knot - I followed the diagram in the OCA textbook on p.193.
I completed two rows in the image above with two rows of plains weave in between.
This is an interesting technique, my Reader's Digest "Handicrafts" features a wonderful rug made using this method on p.86. This book states that "Scandinavian Rya rugs were originally substitutes for fur bedcovers, with long, knotted pile on both sides they were very warm."
The OCA textbook also mentions that "Eastern carpets are knotted very closely together with a short pile giving the possibility of complex designs and fine detail" having looked at some of the ones that we have bought here in Saudi, from Pakistan and Iran, I can only appreciate the workmanship that has gone into them even more.
I kept the same warp for the next stage - this picture is of the woven sample once it was removed from the loom.
This was the edge that was close to the start of the beam - leaving little space to knot the warp threads.
I used blanket stitch to finish off the edge and then tied the warp threads together to secure them. I left a longer length of warp in the other samples to make it easier to tie them off.
.JPG) |
| Finished edge of the weaving |
I also had to learn to repair a broken warp thread whilst weaving my sample - I used the instructions in my "Handicrafts book" to enable me to carry out this procedure.
I realised that at times the warp threads were too slack - this led to the warp threads becoming 'fuzzy'. Once they were tightened the shed opened more easily and the rest of the warp did not become fuzzy.
I really feel I have started to learn "how to weave" - there is a long way to go before I am competent at it, but I have begun to see how the whole process works.
No comments:
Post a Comment