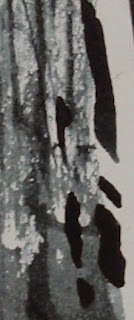
I am looking through my work and sketches to find a drawing with strong lines or linear qualities.
From the drawings I select, I will use a viewing frame to isolate part of the drawing.
I am looking for an area which is not too complicated and has lots of variety in the lines.
I have pinned up both my drawings and my stitching examples from Stages 1 and 2 for inspiration and help in this exercise.
Picture 1:
This was the first drawing that I thought I would look at. It has strong lines and linear qualities - also it is monochromatic - making it easier to look at the lines and textures.
 |
| Sketch 1 with strong lines |
 |
| After using a viewing frame to isolate an area |
They can be used as a single or a multiple strand when worked in stitch.
They have a nice sheen.
I felt the area chosen had a calm feel to it.
 |
| Sample 1 - Calm |
I used 2 shades of blue - a dark and a light - both with 2 strands of thread.
I stitched the dark threads close together vertically.
The light threads were stitched with running stitch - some close together, some far apart, in a horizontal direction.
The sample ended up looking like a seascape.
The light blue stitches 'rippled' like water, the spacing of the stitches gave the picture depth.
The darker blue stitches looked like rocks rising out of the water.
There were no clashes of colour, no dramatic changes of texture
Both the colours used, the type of threads used and the stitches chosen - gave the sample a calm feel to it.
--------------------------------------------
Picture 2:
This was the second drawing that I thought I would look at - it is also monochromatic, has strong lines and linear qualities.
 |
| Sketch 2 with strong lines |
 |
| After using a viewing frame to isolate an area |
I am going to use a plain cream background.
The area chosen looks distressed and broken.
 |
| Sample 1 - distressed and broken |
The stitches worked well - lines and crosses created a distressed and broken image - none of the stitches were worked too closely together - no smoothness.
The stranded cotton provided the thicker lines.
Although I liked the sample - it lacked something....so I tried another.
This time using the same threads, slighlty different stitching techniques and a coloured background.
 |
| Sample 2 - distressed and broken |
The stranded cotton was used first - more stitches were used down the centre than last time - overlapping all the stitches in random directions.
The machine cotton was used over the top - again using long thin lines crossed over each other.
I liked the coloured background, it was a distressed background.
I liked the stitches - they were broken and haphazard.
But it was still very flat.
So I tried a third sample.
 |
| Sample 3 - distressed and broken |
I have used a dark, distressed background - using fabric pastels.
I used 3 types of cream thread - stranded cotton, crochet cotton and cotton perle.
The thinnest thread was worked first in large criss-crossed stitches - then the crochet thread in smaller stitches, finally the cotton perle was worked along the centre.
Overlaying the threads worked well - it gave the area a cross hatched effect - the deepest shade of cream at the centre.
The different types of thread used created more texture.
The stitches were broken and distressed..... it created the look of a crack in a wall with the light shining through.
----------------------------------------
Having the drawings and stitching examples pinned up was a great visual reference.
I knew what materials I had from creating the colour bags, without having to search for everything - this reduced the amount of work that needed to be done before starting.
I liked the first sample as soon as i had done it, the way the stitches were placed changed as i worked on it. It was spontaneous and looked good.
The second set of samples became more spontaneous the more I worked on them - maybe I had thought too much before the stitching started - I was happy with the final result though.
Now to create texture in Stage 4!
--------------------------------------------------------
The finished pages:
 |
| Stitch sample developed from a sketch |
 |
| More finished samples |
No comments:
Post a Comment