Wednesday, December 19, 2012

Part Four: Project 9 - Stage 1

Stage 1: preparation for weaving.
I bought a basic frame loom from a local hardware and craft store - this came with warp attached.
I decided to work with the loom as it was, in the later stages I cut off my samples and went back to stage 1 to learn how to prepare the loom for weaving.

This is the type of loom that I purchased - I was glad it came with the warp on as the instructions were hard to understand (bad translation into English), and it didn't seem to resemble any of the looms that featured on any of the helpful weaving websites.
Basic weaving frame

1) When it came to warping up, the theory is simple - but without clamps to hold my loom in place to get the tension even, it was nearly impossible. However, by using some very heavy chairs to anchor the loom in place, I was able to place the warp thread across the loom with an even tension.
Diagram of the warp threads on the loom
I used a crochet cotton for my warp thread, as the thickness and strength of the cotton was very similar to the warp that was removed from the loom.
Having placed the warp threads on the loom as the diagram above shows, I then rolled the bar on the right back towards the frame in the direction of the arrows.

2) The Shed: When weaving on a simple card loom, the weft (horizontal threads), must go under and over each warp thread. On a loom the warp threads are divided into odds, and evens.
"In the first row of plain weave, all the even threads are lifted up and the weft yarn is inserted between the two layers of threads. The space between the layers is called the shed. In the second row of weaving, all the odd threads are raised and the weft thread is returned through the shed." Course book, p188.
My loom had a bar/shaft which rolled forwards and backwards in order to form the shed - the space between the layers. I made a diagram to illustrate this:
Loom with warp and shaft
Once the shaft (central bar) was placed under the warp threads, and the warp threads were evenly spaced out on the shaft, all I had to do was to roll the bar forwards to lift the even threads, and roll it back to lift to odd threads. Simple:)

3) Beginning to weave: A heading cord gives a firm base for the weaving, and helps to keep the warp threads in place.
"Cut a length of warp thread from your spool, three times the width of the frame. This becomes the heading cord. Double it and then tie or loop one end of the doubled cord to one of the vertical sides of the frame towards the bottom and at the approximate position at which you want to start weaving. Bring the doubled cord towards the first warp thread. Just before you reach it, tie a knot in the cord." Course handbook, p.188
Following the diagram, wrap the cord around each of the warp threads as shown and tie a knot at the other side of the warp, finally tie the remaining cord to the other side of the frame.
Heading cord

The alternative method is to weave a few rows of warp thread - remembering to attach the ends of the thread to the sides of the frame.

Only having achieved this properly for the last sample in Stage 4, I could feel the difference it made when starting to weave. The warp was spaced evenly and there was some resistance when beating down the weft yarn.

Tuesday, December 18, 2012

Part Four: Project 9 - Introduction

Woven Structures
Project nine uses simple weaving techniques to make a textile surface
"You will begin by exploring techniques which will enable you to manipulate and explore the effects of colour and texture and the different qualities that occur when these elements are combined in a structure."
The only weaving that I have been involved with in the past is to teach primary age school children to do basic weaving on a cardboard loom, when the instructions say, "Weaving is perhaps the most technically complex of all textile designing methods." I wonder how I will get on with this project.

This project concentrates on Tapestry Weaving which is pictorial in character.
The same approach that was used to design the fabric for the printing and embroidery projects will be applied to this project. An addition will be to learn the necessary technical knowledge that is needed to construct a tapestry sample.

Research:
Before I started this project I came across two books which mention tapestry weaving - both are fictional books.
The first, recommended by another tutor, was The Lady and the Unicorn by Tracy Chevalier. Although a quick and fun read, it describes the weaving process in detail:

Slit tapestry is mentioned - this is where blocks of colours are woven next to each other without joining. Slits are formed in the cloth which need to be sewn up afterwards.
This was the technique used in 'The Lady and the Unicorn' tapestries, the fictional account by Chevalier lists the reason for this: it was a quicker and therefore cheaper technique than Dovetailing.
Dovetailing is a method where the blocks of colour are joined together - on each row (pick), the colours are twisted together at the point of joining, this leaves no slit to be sewn up.
"Of course, if the patron is willing to pay enough and the design allows for it, Papa will dovetail colours, weaving different coloured threads into each other, interlocking them so that there are no slits to sew. It is fiddly work that takes longer and costs dear, so many patrons don't ask for it, as Monseigneur Le Viste did not. It seems he is too mean and too rushed - just as I expected of a Paris nobleman. There will be much sewing for me in theses next months." P.107 The Lady and the Unicorn, Tracy Chevalier - Kindle Edition
Why you need to understand the process before you design a tapestry:
A tapestry has texture, the colours can only be placed in certain areas, knowledge of how the colours will be joined is essential before the weaver starts - an area of tapestry cannot be painted over, it must be carefully unpicked if a part of the design does not work.
A full sized 'cartoon' must be drawn before the weaver starts work.
"It's easy enough to find fault with them as tapestry designs. To him they are paintings - he hasn't seen that with tapestries there needs to be an even pace to the design to make them smooth, so that nothing jumps out. That is what I do when I draw a cartoon - I make the design big and paint it as I know the wool will look when woven, with less blending of colours and more bright, even patterns. Cartoons are not so beautiful as paintings, but they are essential for the weaver to follow as he works." P.80 The Lady and the Unicorn, Tracy Chevalier - Kindle Edition.
The warp threads:
In tapestry weaving the warp is hidden, only the weft (the horizontal threads) is visible.
"Warp threads are thicker than the weft, and made of a coarser wool as well. I think of them as wives. Their work is not obvious - all you can see are the ridges they make under the colourful weft threads. But if they weren't there, there would be no tapestry." P.113 The lady and the unicorn, Tracy Chevalier - Kindle Edition
Warping a loom:
A simple card loom is easy to thread - but the finished piece is very simple in it's construction. To weave an intricate tapestry, the substructure is very different and much more complicated. As the quote above implies the warp is the most important part of the tapestry - if done incorrectly, too tight, too loose - the tapestry will suffer.
"To warp a loom for a tapestry this size you need at least four people to hold bundles of warp threads and pull on them while two men turn the roller to wind the warp around the back beam. Someone else checks the tension of the threads as they go. That must be just right at the start, otherwise there will be problems with the weaving later on." P.113 The Lady and the Unicorn, Tracy Chevalier - Kindle Edition
Taking the tapestry off the loom:
The time for the 'reveal' - when the tapestry is finished, the warp threads must be cut from the loom. A large tapestry such as 'The Lady and the Unicorn' would have taken many months to complete - payment would depend on the quality of the finished product. Mistakes would lead to financial ruin. Only when the tapestry is cut from the loom can the finished piece be seen as a whole.
" The cutting-off is a good day for a weaver, when a piece you have worked on for so long - this time eight months on the one tapestry - is ready to be taken off the loom. Since we are always working on just a strip of tapestry the size of a hand's length, which is then rolled inside itself onto a wooden beam, we never see the tapestry whole until it is done. We also work on it from the back and don't see the finished side unless we slide a mirror underneath to check our work. Only when we cut the tapestry off the loom and lay it face-up on the floor do we get to see the whole work. Then we stand silent and look at what we have made." P.66 The Lady and the Unicorn, Tracy Chevalier - Kindle Edition
As I work through this project I realised that I have been able to interpret some of the instructions as a result of reading Tracy Chevalier's book.
This is an image from the Wikimedia Commons Library of The Lady and the Unicorn tapestry hanging in the Cluny Museum, Paris, the link to the image is here.
The Lady and the Unicorn tapestry

I then went on to read Alan Hunter's "Landed Gently", The Inspector George Gently Case Files, Book 4. This also featured tapestry weaving and talked of the workshops of Gobelin in Paris.
Whilst there is no 'in depth' discussion on weaving - it did introduce, to me, the workshops and traditional techniques that are used in tapestry weaving.
When asked whether a 'high-warp' loom is a 'superior method' the answer is, "Not on your life - just slower and more back-aching. But all through the centuries the Gobelins factory was turning out class tapestry on high-warps, and a sort of legend has grown round this type of loom." Location 15684, Alan Hunter, George Gently Omnibus (Books 1 - 4)
A description of the fine work that can be achieved with the high-warp loom follows, and having now achieved my very small weaving samples on a very basic loom, you can only guess as to the beauty and complexity of a tapestry made on one of these looms by a master weaver.
"The high-warp loom, simple, massive, was provided for a far larger web than the horizontal machines with their treadles. And such a web was spread across it, awesome in its complexity, an irregular third of it woven in and beginning to be taken up on the lower roller. Here was something different from anything they had seen before. The weaving was so infinitely fine and close, the colours so subtly graduated, that one had to look closely to establish that it was a shuttle and not a brush that had achieved such effects." This quote follows on from the one listed above, same page.
The book also mentions the time scale a tapestry can take; George Gently comments after seeing the small amount of tapestry he has seen on the loom: "you mean that's taken you a year?" must be one that all weavers hear and feel the need to defend their art in their reply.
It also brings in the issue of 'fading' that the wool yarns that have been so carefully dyed to the right shade will not last forever.
"In twenty years four hundred of the tints I'm using there will have faded or darkened. I give that piece ten years after I take it down." Location 15707, Alan Hunter, George gently Omnibus (books 1 - 4)
I did also read some 'proper' books on tapestry and weaving, but these novels really did inspire me to look at tapestry in a different light. One of the major facts to learn from this is that the methods used in tapestry weaving have not changed at all over the years. It is a long laborious process, but one that is carried out through a love of the art - there are no short cuts.

Dovecot Studios, Edinburgh
The Dovecot Studios were started in 1912. They evolved from the William Morris Craft Studio at Merton Abbey in Wimbledon. (I wrote a little about William Morris and the Arts and Craft Movement in this post. William Morris died in 1896)
In their introduction About Dovecot Studios, they say that:
"Dovecot is unique for its highly creative collaboration between artist, weaver and commissioner. Each tapestry combines the creative ideals of all three creative minds and weaver will interpret, rather than simply translate, a design into textile."
They have worked with many contemporary artists to produce significant works: Dame Elizabeth Blackadder, Graham Sutherland, John Piper, Tom Phillips, Patrick Caulfield and David Hockney amongst others.

Looking at their latest sales catalogue here I found a piece by Master weaver Jonathan Cleaver based on Kurt Jackson's work "Grangemouth at Night Smoking" on p.19. In the Interlude piece for Project 8, I attempted a thread wrap based on his Jackson's work "For Bruce Chatwin", here, I used textured threads in my yarn mix. The clever and beautiful weaving created by Jonathan Cleaver did not need 'fancy' yarns, just skillful weaving and careful placing of the right mix of colours to achieve a textured look.

"Tapestry has become the coolest art form" according to Charlotte Philby at the Independent, full article here.
While some tapestry has moved into the 'modern age': Grayson Perry's tapestries were produced in Belgium using a Jacquard loom, his designs digitally reproduced - 2009 saw The Walthamstow Tapestry (Article from the Metro featuring an image of the Tapestry is here). His recent pieces The Vanity of Small Differences (Article from Aesthetica Magazine can be seen here) have also been digitally woven with a mechanical loom.

Dovecot continues to weave by hand, taking on apprentices from Edinburgh College of Art's Tapestry Department. Their pieces are more expensive than those produced on a mechanical loom. Director David Weir states:
"Handmade tapestry is a thought process, everything is slow and deliberate... A machine can't replicate the human touch, the happy accident or the editorial decision."
They work with centuries of trade secrets at their finger tips whilst creating modern day collectors pieces.

Time and skill is a major part of a hand woven tapestry, artist David Hockney visited the studio, to observe the progress of his first tapestry, in the 1960's, this article by Florence Waters for the Telegraph relates the tale link:
"A line which had only taken him, (David Hockney), two minutes to draw had taken the team three weeks to weave. When he pointed this out to the weavers, there followed, well, an uncomfortable silence." quote from director David Weir printed in the article linked above.
I love colour and have yet to delve into the realms of dyeing my own yarns, and yet this current tapestry that is being woven at Dovecot really caught my eye. Link here.
It is the "Large Tree Group" by Victoria Crowe.
"Large Tree Group" depicts the shepherd, Jenny, dwarfed by a snowy, wintery landscape in a palette of whites, browns, greys and blacks. For the first time ever Dovecot is weaving a complete tapestry using only un-dyed yarns from flocks native to Britain and we have been challenged to find this range of colours from within the natural colours of sheep's wool. The finished tapestry will be a unique tribute to the Scottish landscape, the lives of those who work the land and the quality of the wool they produce."
The task of choosing just the right colour yarn to complete a tapestry seems daunting, the shade, the quantity needed - if the selection is to be made from un-dyed yarn, the prospect of 'getting it right' seems impossible, can a natural fleece produce a consistent colour of sufficient quantity?

The work and progress of this piece is regularly posted on to their Facebook page, it can also be viewed by the public from the weaving floor balcony at Dovecot during the week.

Jilly Edwards
Was a student of Edinburgh College of Art Tapestry Department from 1980 - 1982.
I came across her work at Ruthin Craft Centre, I didn't manage to see the exhibition that was held there, but bought the book "Reflections and Investigations" which features many of her pieces and also the essay "Jilly Edwards: Tapestry into the 21st Century" by Fiona Matheson.

Jilly's website, link here, describes the artist, "She is renowned for her use of colour and the painterly nature of her work and the response to place and light.
I also found this wonderful blog, Blethering Crafts, which shows all her work in great detail and has a lot of information about Jilly's work and life.

One of my favourite pieces of Jilly Edwards work is entitled "Matthew's Summer Garden", this was made in 1980 when she was studying in Edinburgh - picture of this piece can be found in the link to the Blethering Crafts blog.
In the book "Reflections and Investigations" this tapestry is featured on page 4, next to it's sketchbook page, a simple sketch with a sample weave and meaningful notes.

The tapestry features bands of colour set within a frame work of grey lines.
In my mind these bands of colour must resemble the colours she saw on a day she sat in Matthew's garden one summer.
The coloured bands that have been woven contain shades and tones of each colour, these have been cleverly woven and almost resemble the way a colour looks when it has been painted. They are not flat colours - they have a liveliness that even paint struggles to capture.
In his essay "Colours, Journeys and Landscapes" p17 - 22 "Reflections and Investigations, Ian Wilson
describes "Matthew's Summer Garden":
"sees her, for the first time, moving away from an earlier representative approach and creating, within the parameters of a grey grid, a spectrum ranging from the palest yellow to dark black. These slender, horizontally-layered bands of colour celebrate the sensuous delights of what the artist herself has described as the 'wonderful discoveries of colour to be made whilst researching our involvement with the landscape" p.18
June Hill, the Exhibition curator for the Ruthin show says:
"She had by then, (the 1980's at Art College), been a practising weaver for a decade, but that time in Edinburgh was critcal for her subsequent development as an artist. 'It was', she explains, 'the place an time where I discovered my voice as a weaver." Introduction to Reflections and Investigations p.5, by June Hill, quote from Jilly Edwards.
Some of Jilly Edwards pieces are tiny, Silent Red Bowl, 1998, measures just 3cm x 12cm (p.22), whereas Ma, 2001, measures 90cm x 230cm (p.23). Seen in the book the visual impact is the same, they are both powerful pieces - it would have been a wonderful experience to have seen them displayed at the Ruthin Craft Centre.

William Kentridge
I came across a book on William Kentridge's Tapestries in Cape Town, South Africa a few years ago. It was the first time I had seen a book on modern tapestry and I was amazed by his work.

William Kentridge was born in Johannesburg, South Africa in 1955. This was just a few years after Apartheid was introduced to the country.
He was interested in politics, and realised that an effective way to get his message across was through theatre and art. In "About Kentridge" from The Philadelphia Museum of Art link here:
"he would find theatre and art better suited to grappling with his country's tension and plight"
Of his exhibition at the Philadelphia Museum of Art, "Overview" link here.
"The tapestries stem from a series of drawings in which he conjured shadowy figures from ripped construction paper and collaged them onto the web-like background of nineteenth-century atlas maps."
The "series of drawings" are in fact his "Puppet Drawings". The 'shadowy figures' are torn from black construction paper - the figures are in silhouette.
"the figures - often burdened with the weight of objects and the world - become refugees, migrants, and movers of possessions."
Kentridge worked closely with the Stephens Tapestry Studio in Johannesburg to translate his work into a woven image. Marguerite Stephens carefully translated the artist's work into a full-size cartoon before handing over the image to the weavers.
Link to the Philadelphia Museum of Art "Stephens Tapestry Studio" which also features images of the women who worked on the tapestries is here

The tapestry was woven using the French Gobelin high-warp technique on vertical looms. Stephens studio have created nearly one hundred tapestries since 2000, all based on Kentridge's seventeen Puppet Drawings.
"For Stephens, the combination of a strong artistic vision and meticulous execution is what produces a successful tapestry, and it can be judged only when the tapestry is released from the loom and hung for the first time, becoming a work of art in its own right that possesses reverberations of the touch of all who participated in the process of its making." see link re Stephens Tapestry Studio.
This is a video clip for a preview of Kentridge's tapestries entitled "William Kentridge: Anything is possible", in it you can see the weavers at work on the tapestries along with a commentry by William Kentridge, he talks of a tapestry as a "portable mural that you can carry with you to your next palace."

In this link from Art21 here you can see images of the tapestries.

In his essay "Permanent Projections" from the book "William Kentridge: Tapestries", Carlos Basualdo discusses how the tapestries were not faithful reproductions of the original drawings.
"The change of scale seems to imply for Kentridge a careful and precise rethinking of other aspects of the image. Colour marks are added to the uneven black surfaces of the figures and the maps; the shape of one head gains focus: and, here and there, carefully added elements - the figure of a bird, fragments of typewritten pages - appear that were absent in the drawing."  p.14

These tapestries and the artists involved in them have left me with a feeling of wonder and amazement. The whole process is so labour intensive and slow and yet each artist seems to live through their tapestries and feel that their work can be best expressed through this medium.

Tuesday, December 4, 2012

Part Four: Project 8 - What have I achieved?

The first question asked is
Did I enjoy inventing constructed surfaces?
Yes I did - I was unsure of many of the techniques when I started, which made me unsure of the way to go with each of these exercises.
Once I started, the ideas grew and the samples started to be produced.

I think my sense of achievement and enjoyment grew because I hadn't made 'constructed surfaces' before. It seemed a daunting project at the start, but by the end I have more ideas that I would like to try out in the future, using some of the techniques that I learned during these exercises.

Was I surprised by the results?
Yes, having tied, manipulated, threaded and got tangled up... to then achieve a surface that I liked was a great surprise.
Having to find a way to strengthen one of the samples: Stage 2, Exercise 3, Sample 3: here and for that to work, surprised me. I started exercise 3 with an image in my mind and was unable to reproduce that image - but, I think I found a compromise with the sample that I made and I was happy with the result.

Can I see a connection between my choice of materials and the types of structures that I made: Eg. regular, irregular, small or large scale?
Reading this question makes me wonder if I should have been more adventurous - but at the back of my mind is the fact that at some point this work has to travel to the UK, large unruly pieces would be difficult to pack.

BUT.... as an answer to the question, "can I see a connection?" - yes.
I have made smallish, regular pieces with smooth, fine threads - in some ways the unfamiliarity of the techniques may have led to a more conservative attitude when constructing the samples. Once I master a technique I am usually more willing to be free in the application of it.

Some of the braids became larger and less regular - there is the piece made with fleece: Stage 2, Exercise 2, Four Strand Flat Braid - sample 2, here. This is a big, squishy, rough edged braid - this sample has a very different look to the other braids made from soft wools. It is more tactile than the other samples.

Which sample worked best?
My favourite sample is this one: Stage 2, exercise 4, link here
Sample made for Stage 2, Exercise 4
I like the fragility of the piece.
The sample has given me some inspiration for my final piece in part 5 - the idea of using maps and grids - the possibility of having areas that will have been distressed.
It was a piece that I wasn't really sure where I was going with it; from my initial idea of how I was going to construct the sample, I was then able to make a piece that I was happy with.

Each stage of the sample produced a 'nice' result - I felt brave making changes that were irreversible. I held my breath when I used the heat gun, I wasn't sure how much of the Tyvek would burn away, whether the threads would disappear forever.
I still haven't plucked up the courage to cut the piece from the frame and stitch it onto a background - maybe this one will stay on the frame?

How accurate was I in matching all the colours in my postcard?
a) with paints
I felt happy with the paint swatches I made to match the postcard colours.
With the printed picture there is a flatness to the colours - the image in the book is glossy, the photocopy is matt. The reproduced image is very 'flat' - the texture and the liveliness of the paint in the original work has been lost in the copies. But, having mixed and matched the colours, they were pretty close, I probably missed out several of the shades and tones of some of the colours as there were just so many.

b) with yarns / other material
I was unsure even with a fairly good collection of yarns, that I would be able to accurately match both the colours, and the textures of the pictures.
However, looking back at the results from the interlude exercise I am fairly happy with the thread wraps that I made.
It is one of those exercises that, I am sure, will get easier the more times it is done, I also think that it helped me look at the image more objectively. If this was part of my design process for a finished piece it would also help me to buy the right materials, it would reduce the need to 'start again' because I would have already planned and sampled how the fibres worked together.

Finding the right texture - it certainly made the thread wraps more interesting, this is hopefully something that I will experiment more with in the next project - weaving.
I think working out the proportions of each colour and texture was possibly the hardest part - a skill to be built on?

Saturday, December 1, 2012

Part Four: Project 8 - Stage 2. Ex 4

Exercise 4
This was the exercise that I was not really sure where I would go or what I planned to do in it.
The instructions were to make a grid with rigid materials  and then to experiment by:
  • fill in some of the spaces in the grid - some areas will be open, others will be more solid.
  • work diagonally across the grid, weaving in and out of the structure with various materials.
  • use part of the grid as a frame to enclose more intricate constructions.
  • use the grid as a base structure to weave other yarns and materials.
I was going to revisit some of the techniques that I had used in exercise 3 when I looked through Gwen Hedley's book "Surfaces for Stitch".
This is a wonderful book that encourages you to experiment and try out new surfaces such as: plastics, films and fabrics in your textile work.
Although it gives you some direction on how to complete each technique - it is not a simple 'to do' book. I felt it inspired me to experiment rather than simply following a set instructions.

Using the section on 'Creating the Surfaces' for inspiration, I started my experiment for exercise 4.

I used a square copper frame bought from the Knitting and Stitching Show a few years ago:
Copper frame approx 13cm square

and then wrapped stranded cotton embroidery thread around the frame - both horizontally and vertically:
Creating the warp threads

I prepared a painted sheet of 'Tyvek' paper.
One side was painted with red acrylic paint, the other side painted with blue.
The painted sheet of Tyvek

Once the first coat of paint was dry, I added a layer of gold paint over the red.
I then printed with black acrylic paint - adding 'dots' with the lid of a paint tube, lines with the edge of the handle of a toothbrush. Finally adding marks made with gold acrylic and the bristles of a toothbrush.
Adding gold and black acrylic paint

Once it was dry I added dots of gold.
I liked the way the design looked with the added gold dots - I know I am going to cut the paper into strips, but I thought it was important that the design was 'exciting' and dynamic at this stage
Going dotty

Having cut the sheet of Tyvek paper into strips, I wove them in and out of the thread grid on the copper frame.
The blue strips were woven first, then the frame turned 90 degrees; the red strips were woven over and under the blue strips and the thread.
Weaving with strips of Tyvek paper

I started to machine stitch on the woven surface.
Loosening the tension on the machine and dropping the feed-dogs, I stitched red metallic thread on the red areas and blue metallic thread on the blue areas.
I stitched horizontally and vertically creating grids of metallic thread.

I then added areas and shapes of stitching with the gold thread, followed by lines of black thread which mimicked the marks that were made on the paint.
I was happy with the surface that had been created - but knew I was about to heat the surface and possibly destroy all the evidence of my work.
Machine stitching on the woven paper sample

I have heated Tyvek with an iron and achieved a surface which shrank and 'bubbled'. This time I used a heat gun
Holding the heat source several inches away from the Tyvek I achieved a surface which blistered, shrank and went into holes. After my initial panic I decided to burn away different areas - the thread seemed to 'melt' with the heat - the original grid of stranded cotton stayed intact.

Directing the heat gun towards the painted surface took some of the colour away - leaving the grid of metallic threads against a whitish background - heat it too much and you are left with just the threads, heat it more than this and you are left with holes.
I also decided to melt and shrink the edges, this left a rough and fragile looking finish to the piece

This is a photograph of the woven, stitched and burned sample against a white background.
Although you can see the detail - you do not see the fragility of the piece - the shadows fill the gaps that have been made.
Having used a heat gun on the woven surface

This is a close up image of the piece:
Close up

Holding the piece away from a surface allows the light to shine through.
To me, this has started to resemble a map - the burned areas look like streets and shapes of populated town areas.
The grid of threads - the lines drawn to show the scale of a map.
Finished piece held away from a surface

In silhouette against the light.
This has started to look like rusted metal - reminding me of a piece I bought from White House Arts by the artist Rachel Merrington.
Finished piece held up against the window

Rachel Merrington: information can be found about this artist on the website for White House Arts, Rachel's portfolio can be seen here
Her "work is based on the landscape and the objects found in it. The eroding of surfaces and the way artefacts become part of their surroundings is the starting point for the work. Using maps and text reminiscent of the place, she works in steel using etching techniques to erode spaces in the metal."
Ely: Rachel Merrington
This piece hangs against a wall in my house, it would be ideal to have it hanging up against the window so that the light could shine through.
It shows a double sided map of Ely and the cathedral. the piece is quite small and fragile in places. I love the lines of the piece and the lettering that is contained within the frame.

Link to my theme: Discarded
The idea of removing areas and including letters, may be one taken into my final piece "discarded". The idea of moving (away) and discarding the areas, places and people who you have come across throughout your life - memories that are now distant and faded versus the current life you lead in its full glorious technicolour.
                                                       ------------------------------------

I have been surprised by my reaction to this exercise, I feel inspired by the techniques that I have used. I started by looking at reflections in the windows of a skyscraper :
Tall buildings near the Gulf Hotel, Bahrain

This is a close up of the reflections. Here you can see the 'grid' formed by the windows, the irregular lines of the reflections and the subtle colour changes.
At this point it started to resemble a woven surface.
Close-up of the reflections in the windows

This is a repeat pattern using this image:
Repeat pattern of the reflections in the window

Although my sample didn't resemble the repeat pattern, or the reflections in the window it inspired the way I chose to fill the grid on the frame and also the use of the colour blue.... after that it took on a life of its own.

While we were in Bahrain that weekend, we visited the Bahrain National Museum - this is situated in Manama and contains modern art and sculpture alongside the ancient artefacts of Bahrain - according to wikipedia the museum covers 6000 years of Bahrain's history.
One of the parts of the museum that caught my eye was the floor - maps of Bahrain, from the ancient to the modern.
Here is one of the (many) photo's that I took of the floor - this links back to the piece I made for this exercise; I find the lines and shapes that appear in these large scale maps interesting and inspiring.
Map of Bahrain: floor design in the National Museum


This is the end of project 8, I will write up "What have I achieved" before moving on to Project 9 which covers weaving.

Sunday, November 25, 2012

Part Four: Project 8 - Stage 2. Ex 3

Exercise 3
This exercise looks at wrapping, binding, interlacing and criss-crossing threads within a frame.

During my research for this exercise I came across the work of:
Maryrose Watson: the link to the website with images of her work is here.
Maryrose graduated in Textile Design from Chelsea School of Art in 2010.
She makes wrapped wall pieces; she wraps, overlaps and intersects yarns around a frame.
The frames are an important part of her work, they have to be strong to withstand the tension that the threads will put them under. The frame is like "the skeleton in relation to the body and clothing."

The thread she uses is made from viscose rayon and is highly reflective. The reflective surface means that the piece will "react with light to create a constantly changing visual experience, intensified as the observer moves around the work." You can see the effect the light has on the threads in these two images of the same piece: This image is from "Urban Landscape Series 2" Design 1 and this is the detail from it link. You can see that the green threads appear lighter or darker depending on the angle the photo of the work is taken.

In this exercise we are asked to make a frame and then to wrap and bind the work - Maryrose "works off loom, laying both the warp and the weft simultaneously, wrapping yarn directly around a frame structure. By applying my own mathematical formulae to the intersecting layers of yarn, geometric forms emerge." The different ways the threads intersect causes ovals, circles and diamonds to form, this is an image of "Series 2: Circle 2" link, this is an image of "Urban Series 1: Oval, Square, Diamond" link.

She states that her work is "concerned with challenging established concepts of weave." I think she truly has.

Information and quotes are from Maryrose Watson's  website:
http://www.maryrosewatson.co.uk/about-2/
the quotes also feature in:
Selvedge Issue 48: "String Section - Liz Hoggard unravels the work of Maryrose Watson" pg 68-70
                                                          --------------------------

I wasn't sure initially where to start, the instructions stated:
Decide on a shape: a square, rectangle, triangle or anything else. Use more rigid materials to form the outline of the shape so that you have a frame. Find a way of joining the ends, so the shape is firm and stable.
Once that is made you can wrap, bind, interlace or criss-cross threads between the frame.
I also had to think of the effect of light and space between the yarns, threads or other materials.

I did some research on the Internet and looked at some of the other student's blogs.
I also looked at macrame techniques for the types of different knots that could be used, and ways of tying the threads to the frame.

Sample 1:
My first sample was a dreamcatcher, this would involve making a frame, attaching threads to it and some knotting techniques.
I followed the instructions on this website - they were very simple and easy to follow.

The frame that is required for a dreamcatcher has to be round in shape. I decided to use a lid from a plastic tub, cutting out a 'hole' in the middle.
This was then wrapped with a strip of fabric, which made the frame more stable.

I chose to use a variegated crochet cotton to make the web - this has a sheen, is smooth and will allow the light to shine through.

The finished sample:
Dreamcatcher

The holes in the web get smaller as you move towards the centre - the pattern becomes denser.
The variegated threads allow the web to have areas of bright, light yellow and areas where it is darker and almost orange in colour.
It has a dynamic pattern - although your eye is drawn to the centre of the design, the lines spiral outwards distracting the eye.

Sample 2:
Weaving with sticks: another simple idea with great instructions from this website.
I used a variegated yellow thread, two colours together (yellow/lilac) and lilac thread.
The threads were wrapped around the sticks with no gaps showing through
Wrapping and weaving with cocktail sticks

I like the way the central cross stands proud of the background threads.
The background threads appear darker than the threads wrapped around the central sticks.
I know you can vary the way you wrap the thread around the sticks and this would vary the overall look of the wrapping - this is something I will try out later.

I took this photo in Bahrain, it resembles the woven and wrapped sticks. The picture is of a wooden carport roof.
I have a series of photos that I have labelled 'texture' pictures on my hard-drive, maybe it's time to print them out and put them in a sketchbook with annotations, an immediate reference for my work?
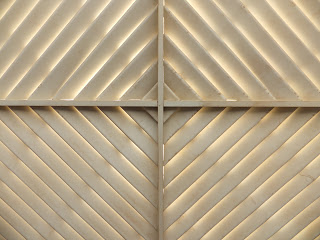
A 'woven' wooden roof
  
Sample 3:
Having tried out some different techniques I knew that I wanted to play with light and the spacing of threads in a finished sample.
I started by joining skewers together using the technique above (weaving with sticks), I then carried on wrapping the threads along the length of each piece of wood.
Wrapping the wood gave the skewers a nice finish, but also allowed a surface that would 'grip' to any threads that would be wrapped, tied or bound onto them.

Initially I wanted to wind thinner machine embroidery threads across the frame - some areas would be dense with thread, other areas would have fewer threads.
Having tried this, the frame started to warp and buckle, as I wound more tightly, the frame started to shrink - I had to work out a plan to make the frame stronger.

The answer lay within the wrapped skewers - although the thread seemed densely wrapped, there was room for improvement. I pushed the threads tightly together, this made the finished area/frame, slightly smaller, but the frame was now much more stable.

Finished sample:
Wrapped bound and interlaced threads

Now my frame was stable I decided to knot threads onto the frame - first along one edge, then along the second edge.
I also decided to use the same variegated yellow crochet cotton that I used to wrap the skewers with.
The threads were knotted closely together at one end, gradually increasing the spacing between the threads towards the other end.
Where the threads crossed, they were woven under and over the 'warp' threads.
Close up of the threads knotted and woven on the skewers

Once the threads were tied on and woven they eventually reached the opposite side - here I tied the ends off.
This left a 'fringe' - I didn't want to remove the threads - they added interest to the design.
These ends were then threaded with some copper beads and tied together.
The 'fringe' knotted, beaded and tied together

I also added a beaded braid which hangs down from the cross bar at the bottom of the frame.
The 'fringe' has been trimmed and a hanging loop has been added in the final piece (not photographed).

I am happy with the piece that I created, I was hoping to use more colours so that there would be a play with colour as well as light and space. But, for now, this is my finished sample
The variegated thread works - the subtle changes in colour add to the piece.
The spacing of the threads gives a feeling of depth.
The design comes forward and moves away from the eye when looking at the areas of density of threads, and the areas where the threads are more sparse.

I looked up 'string art' on the Internet, and a whole world of possibilities opened up.
I found these links:
http://www.thisiscolossal.com/tags/string/
This really opened my eyes to the possibilities of what could be achieved with threads and frames, there is the incredible "Letting Go" by HOT TEA, a sun of threads. This has got to be the most tactile installation, a piece of 'grass' to lie on underneath the hot sun. what a way to experience a piece of art.

There are other artists featured in this article who have all produced great work, but, the artist who really captured my imagination was Gabriel Dawe.
He is also featured on this website:
http://www.gabrieldawe.com/installation/plexus_013.html
He has created a series of installations entitled "The Density of Light".
The link takes you to one of my favourite pieces "Plexus no.13"
This image shows you the installation and then close ups of the threads that interconnect.
I think in my mind this is what I would have liked to create on my very small wrapped frame - maybe it was lack of space and inspiration? (I think I have a long way to go before I can envisage work on the scale and excellence of Gabrielle Dawe!)

According to the bio:
Originally from Mexico city, Gabriel Dawe creates site-specific installations that explore the connection between fashion and architecture, and how they relate to the human need for shelter in all its shapes and forms. His work is centered on the exploration of textiles, aiming to examine the complicated construction of gender and identity in his native Mexico and attempting to subvert the notions of masculinity and machismo prevalent in the present day.
I first saw this artists work on this blog:
http://www.thejealouscurator.com/blog/2012/10/29/im-jealous-of-gabriel-dawe/
This image really shows the work in a beautiful architectural space.
It is as if a rainbow appeared inside the building.

This has been a bit of a journey for me, initially I was thinking 1970's pin/string art and wondering how it was all relevant to textile art today.
Then the wonderful Selvedge magazine issued the article on Maryrose Watson and I was sold.
I think I have a long way to go though, these pieces require planning and certainly in Maryrose's case - an element of mathematics to make them work.

Friday, November 23, 2012

Part Four: Project 8 - Stage 2. Ex 2

Exercise 2
The instructions are to make a collection of hand twisted ropes or three/four strand braids.
They should have different surface qualities: hard, soft, smooth, shiny, rough.

I have made braids before, but it has been a while. This time I am asked to experiment with different threads, yarns or materials, for example, fabrics, fleece, leather, plastic.

We have been given diagrams which show how to make a four-strand chevron braid, a four-strand round braid, a four-strand flat braid and a twisted rope.
I also have two Kumihimo braiding disks - one round, one square, and a lucet. I will include details of these braid making techniques with the samples that I have made.

Four-strand chevron braid
Sample 1: Soft chunky wool
This produced a nice even braid, the technique was easy to do.
Using the soft chunky wool produced a braid which had soft and smooth surface qualities.
Four-strand chevron braid using soft chunky wool
A close up of the braid:
Close up of the four-strand chevron braid

Sample 2: Using contrasting textures.
This sample uses chunky brown yarn, rough twine and fluffy, silky eyelash yarn
Using the contrasting textures of the yarns and the twine produced a really interesting braid.
When you look closely at the finished braid it is hard to tell that it is made using the same technique as the first sample.
This braid has many surface qualities: soft and smooth from the thick yarn, silky and shiny from the eyelash yarn and rough from the twine.
Four-strand chevron braid using contrasting textures
A close up of the braid:
Close up of the braid with contrasting textures
 
Four-strand round braid
Sample 1: Soft chunky wool
Another simple technique that creates an interesting braid.
This round braid used the same chunky, soft wool as the previous technique and has the same suface qualities: soft and smooth.
Th round shape makes the braid feel firm and strong.
Four-strand round braid using soft chunky wool
A close up of the braid:
Close up of the four-strand round braid

Four-strand flat braid
Sample 1: Soft chunky wool
This braid features a herringbone type pattern on the surface.
Surface qualities are: soft, smooth
Four-strand flat braid using soft chunky wool
A close up of the braid:
Close up of the four-strand flat braid

Sample 2: Fleece
I really like this braid - the fleece fabric was great to work with and the scale of the braid produced is huge in comparison to the other materials I used.
Surface qualities: soft, smooth
Four-strand flat braid using strips of fleece
A close up of the braid:
Close up of the braid made of strips of fleece

Rope
I really enjoyed making the twisted cords - I have made them before, but it is so easy to do and the finished product is strong, versatile and can have an interesting finish.

Sample 1: Knitting wool
The two cords were made using a combination of yellow and green knitting wool.
The finished cords are both very different from each other - there will be handwritten notes on how each finish was achieved in the work that will be sent off to my tutor.
Surface quality: soft and smooth - although not quite as soft as the pale pink wool in the previous exercises.
Rope made with double knitting wool

Sample 2: Twine
I really like the natural colour and the rough feel of twine, by making it into a rope it has been made even stronger.
Surface quality: rough and hard
Rope made with twine

Sample 3: Thin, clear plastic
Having rescued a dry cleaning bag from the rubbish, I though that I would cut it into strips and make it in to a rope.
What surprised me was the result, I had expected this flimsy, clear material to have a rough / ragged finish, and that it would be able to twist like the previous materials had.

The plastic got smoother and shinier the more I twisted; the amount of twisting did not impact on the elasticity of the plastic - it was very hard to get the cord to twist back on itself at the end of the process.
I ended up with a smooth, shiny rope with very little twist.
Rope made with thin transparent plastic
A close up of the rope:
Close up of the plastic rope

Three-strand plaits
I have made hundreds of plaits over the years - it's the sort of thing girls like to do.
I thought I would plait some materials together and then gather them at the end.
One of the strands was a thin, but strong, thread - once the plait was complete the thicker threads were pulled up together - causing it to buckle and gather.

Sample 1: Knitting ribbon, cord and thread
I like this sample - it is tactile and would work well in a piece of stitching - the cord could be gathered on to another surface to add texture.
Surface qualities: shiny, soft, crunchy
Three strand plait using kitting ribbon, cord and thread

Sample 2: Thin, clear plastic, wool and thread
I started this sample by plaiting the strands quite tightly, this produced the part of the plait on the left of the picture. It is tight, knobbly, narrow and was hard to gather.
I then decided to plait more loosely and achieved the section of the plait that appears on the right of the picture - when this was gathered it became looser, wider and softer than the first part of the plait.
It is also more interesting visually than the tighter part of the plait.
Surface qualities: shiny, soft and smooth for the right hand side of the plait. Rough, crunchy and hard for the left hand side of the plait.
Three-strand plait using thin plastic, wool and thread

Lucet
Sample 1: knitting wool
For more information on the Lucet - here is a link
The cord produced from the Lucet is square in shape; the Lucet has been used for making cords for 'over one thousand years'.
I chose to use knitting yarn to make my cord, but, you can use 'any material, any size, any colour' to make a cord using the Lucet.
It produced a tightly woven, smooth cord - I really like this cord, especially the way the colours are distributed along the length.
I may have to experiment with other materials using this technique.
Surface qualities: firm, smooth
Lucet cord

Kumihimo: a Japanese form of braid making.
A few years ago I bought a card disk to make Kumihimo Braids - realising that it would not last I then went out and purchased a round one (for round braids), and a square one (for flat braids), made of polystyrene - examples of these can be found here.
Of course these have sat around in my cupboard since then, this was an ideal time to unearth them and make a sample for this section.

The Kumihimo disk has notches which are numbered, once threaded, you follow the 'simple' braid-by-numbers instructions to achieve a finished braid. These can be tied off or you can use 'jewellery findings' to hold the ends together.

Sample 1: cotton knitting yarn
This flat braid was made using the square kumihimo disk.
The soft knitting cotton provided a smooth surface to the braid.
Kumihimo braid

I have really enjoyed making the ropes and braids in this exercise.
The process makes the fibres stronger and they are both decorative and useful.
They could be used to attach and hang work, be stitched down onto surfaces .... I then did some research and found this artist:

Jacqui Carey - Information about this braidmaker is here
As you look down the pictures shown at the bottom of her C.V. you start to see really interesting images of braids made from unusual materials such as: tube lights, wire and beads, paper porcelain, my favourite has to be her "Monster braid, bolster cushion" - this really shows you the scale that you can work to with braiding -the bolster has a diameter of 20cm.

Jacqui uses a wooden maudai with separate bobbins to achieve these really large braids - there is a picture of her at the bottom of her C.V. demonstrating Kumihimo using this tool.
A page with links to some of the 'bigger' tools for making kumihimo braids is here - there are plenty of other sites that sell this equipment - but  a marudai is definitely on my list of 'must have' tools now.

Seeing these images and reading some of the history of kumihimo has really opened my eyes to the possibilities that can be achieved with braid making - it does not just have to be practical, these cords and braids can certainly be transformed into a piece of art.


References with links have been included in the text.